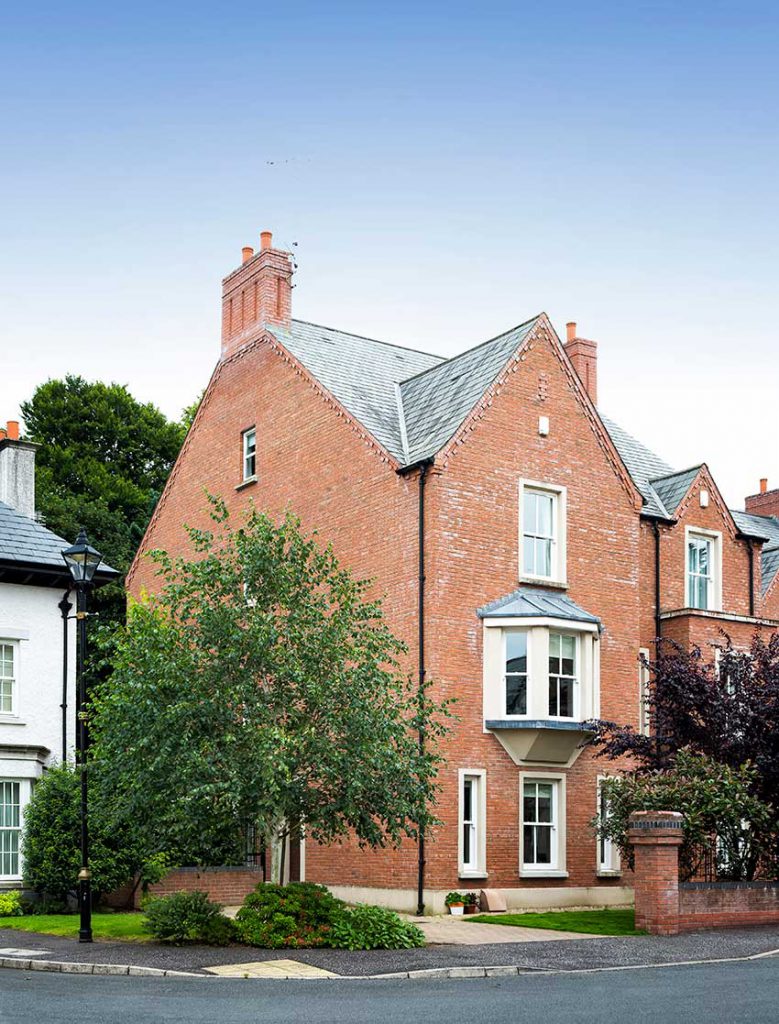
How James and Rhea Kipling of Co Antrim undertook a light filled renovation project upon returning home from Australia.
In this article, James and Rhea cover:
- How they managed to bring in additional light to their existing house
- Details of their extension and reconfiguration project turning the house on its head
- Trade off between adding windows and losing energy efficiency
- Details of redesign including how to make best use of rooflights
- Which elements were moved where and best design choices to add light
- Minimising impact on neighbours and working with local area’s management company
- Garden transformation and redesign to make it more usable and enticing
- Artificial lighting and making it work
- Kitchen design
- How the project was managed and built
- Tips to keep on top of the budget
- Heating choices and how they’ve worked out
- Full specification and supplier list
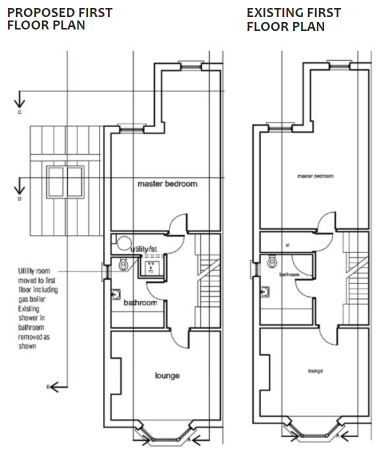
- Ground floor and upper floor plans: before and after
House size before: 214 sqm
House size after: 227 sqm
Plot size: 280 sqm
Build cost: £50,000 including kitchen and landscaping
House value: in the region of £400,000
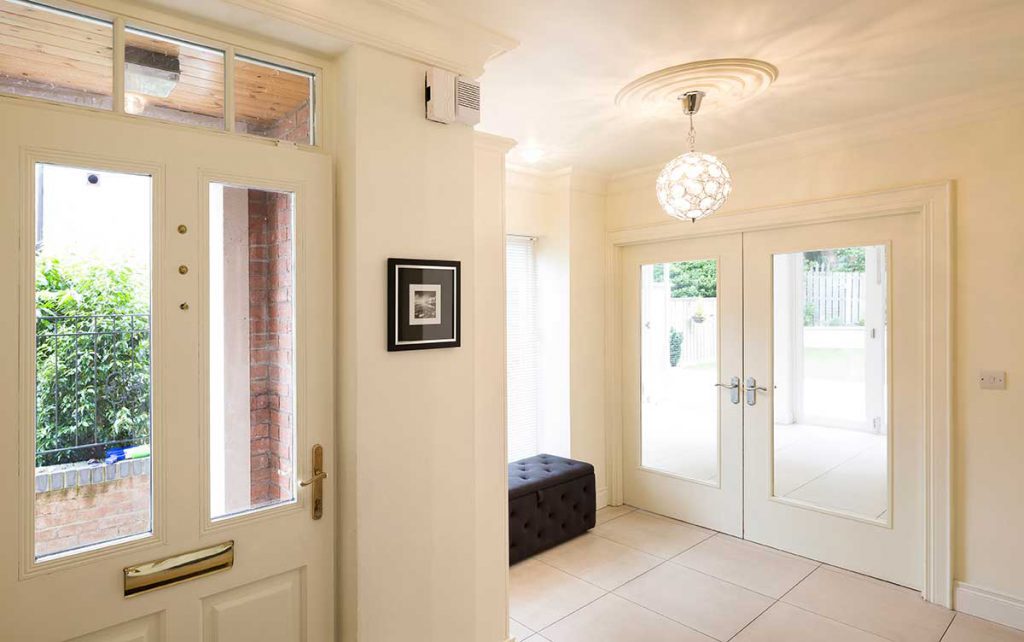
“Our family home here in Ireland was very dark; the sombre hall led to a poorly lit corridor and kitchen. Part of the problem was that there were few windows,” explains Rhea. “We’d just returned from Australia where we’d rented a lovely house and the contrast couldn’t have been greater. Here we had to turn on the lights even on a bright summer’s day! We simply had to make a change.”
“It was so dark and miserable, we fled the house every Saturday to bring the children somewhere else. Thanks to the renovation, we can now enjoy a chat in the kitchen and have people over. It’s transformed our lives,” she adds.

“We had to turn on the lights even on a bright summer’s day! We simply had to make a change.”

Preparations for a light filled renovation
James and Rhea also needed more downstairs living space to cater to family life; with all of these requirements they felt an architect would be best suited to help them find a solution. “James had a friend he’d gone to university with, who was an architect. We got along really well so we went to see previous work of his and fell in love with his style and the fact that he didn’t just focus on adding space, the flow was very important to him, and illumination.”
“We wanted the house to be as open as possible and he found a way to do that by adding very little floor space,” says Rhea. The architect also helped navigate through the planning and building control processes: “Getting the energy calculations done was especially difficult as we had to make sure we kept to the energy conservation requirements,” continues Rhea. As windows are less thermally efficient than walls, insulation often has to be added to make up for the heat loss.
“We did a lot of research to find the style we liked, we went to the SelfBuild show in Belfast and we got some good ideas, and found some of our suppliers. The design would obviously have to suit the house and our circumstances so it was a question of adapting these concepts to our needs.”
They also went online and consulted magazines to see what options were open to them; their wish was to add as much glazing as possible. “We found out what we could and couldn’t do – for instance many of our neighbours went with brickwork, but we chose glass. Thankfully we were able to do this, and, despite the contrast I feel the glazing blends in really well.”
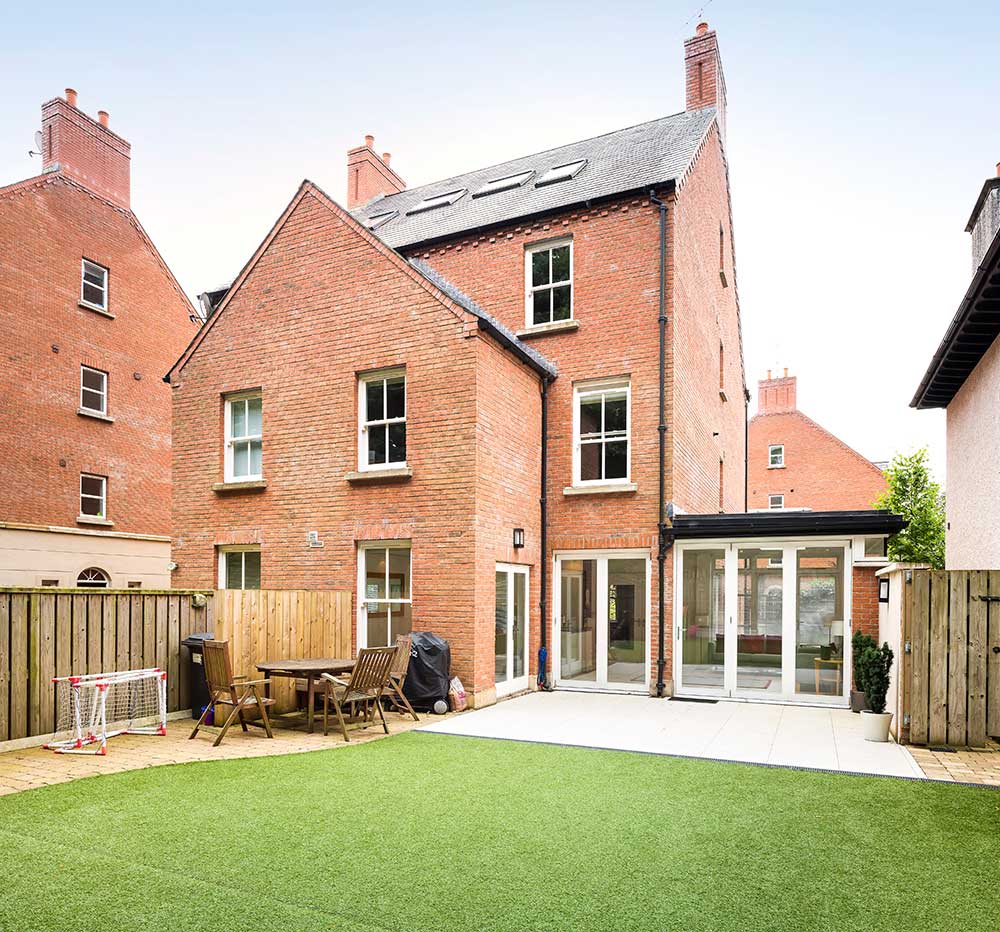
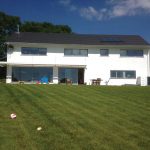
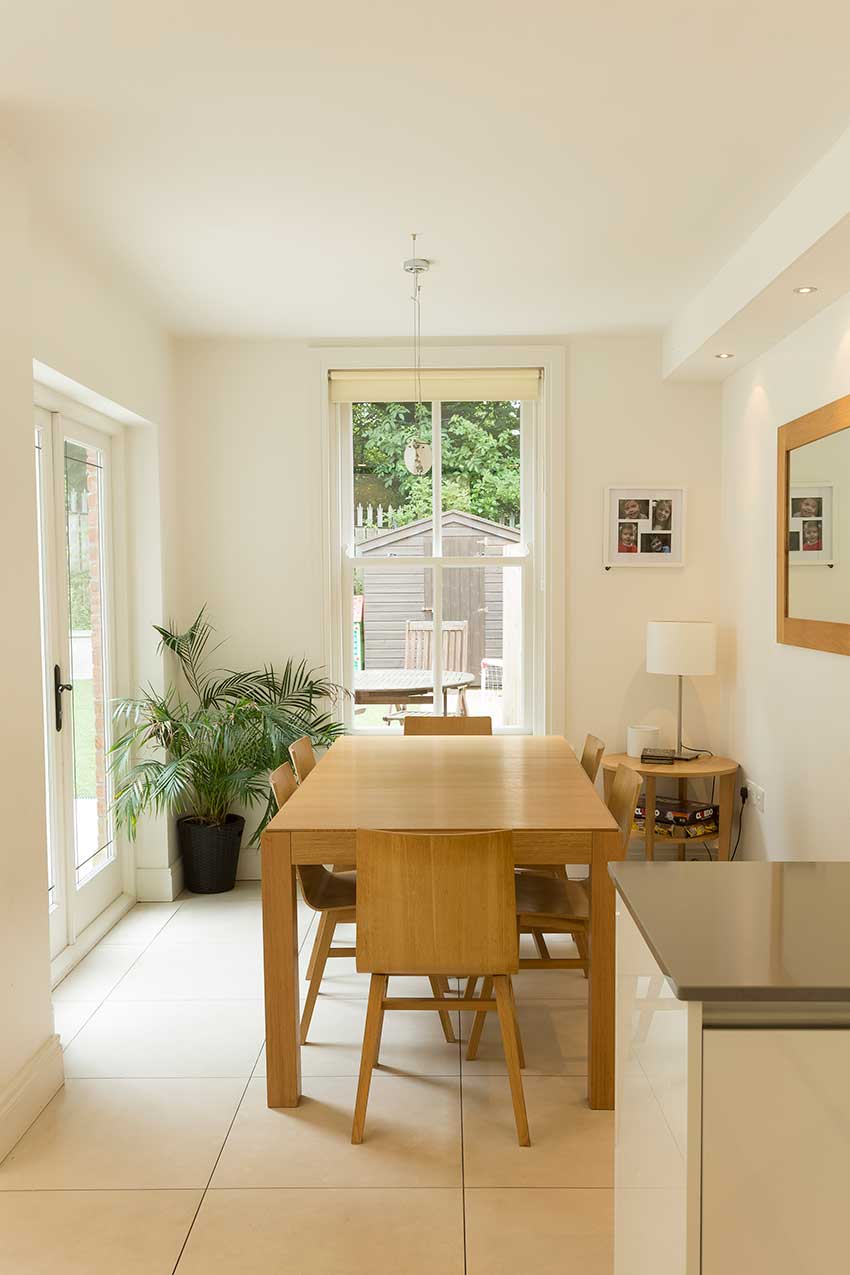
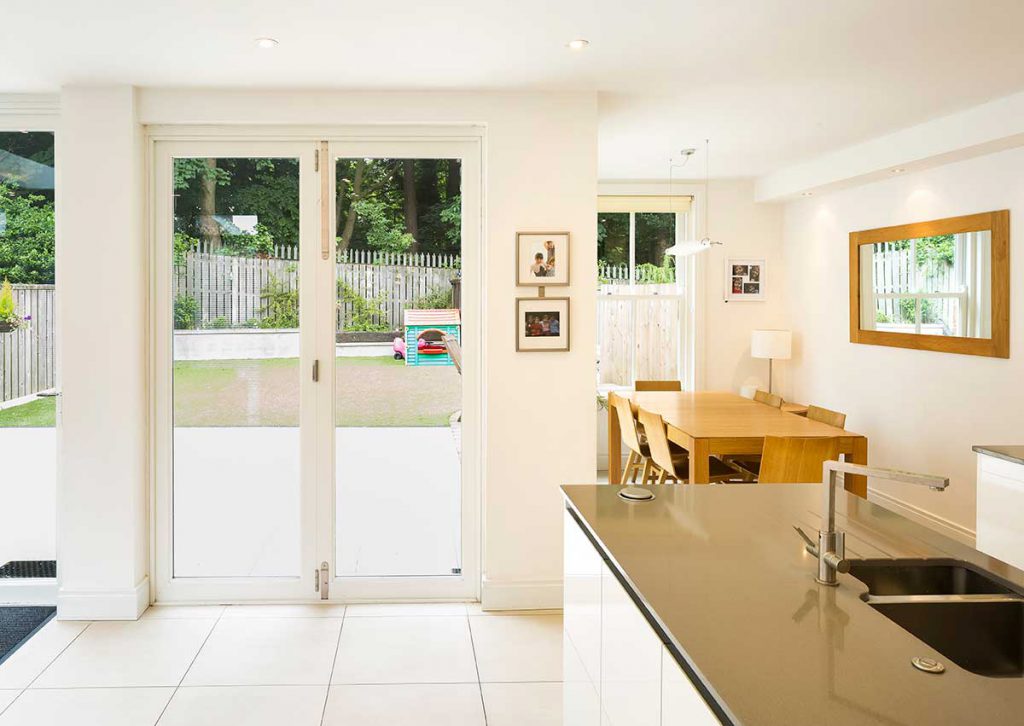
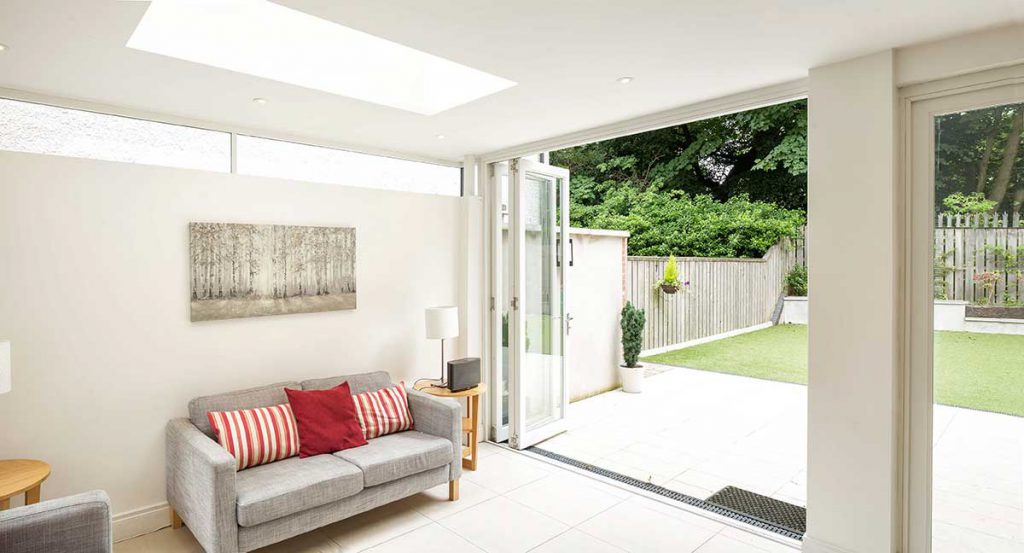
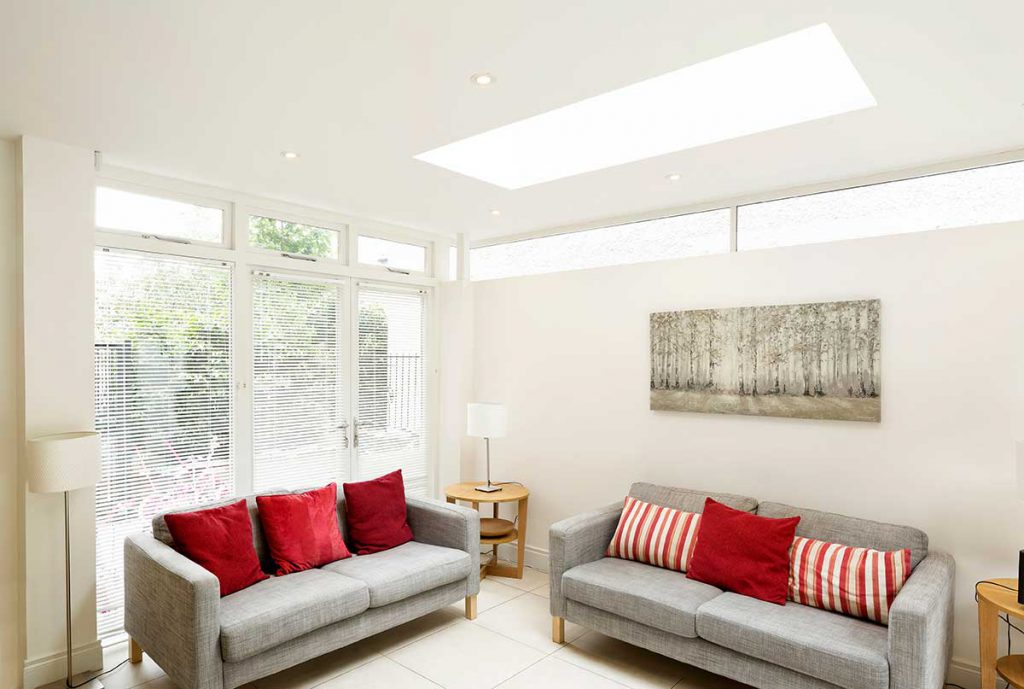
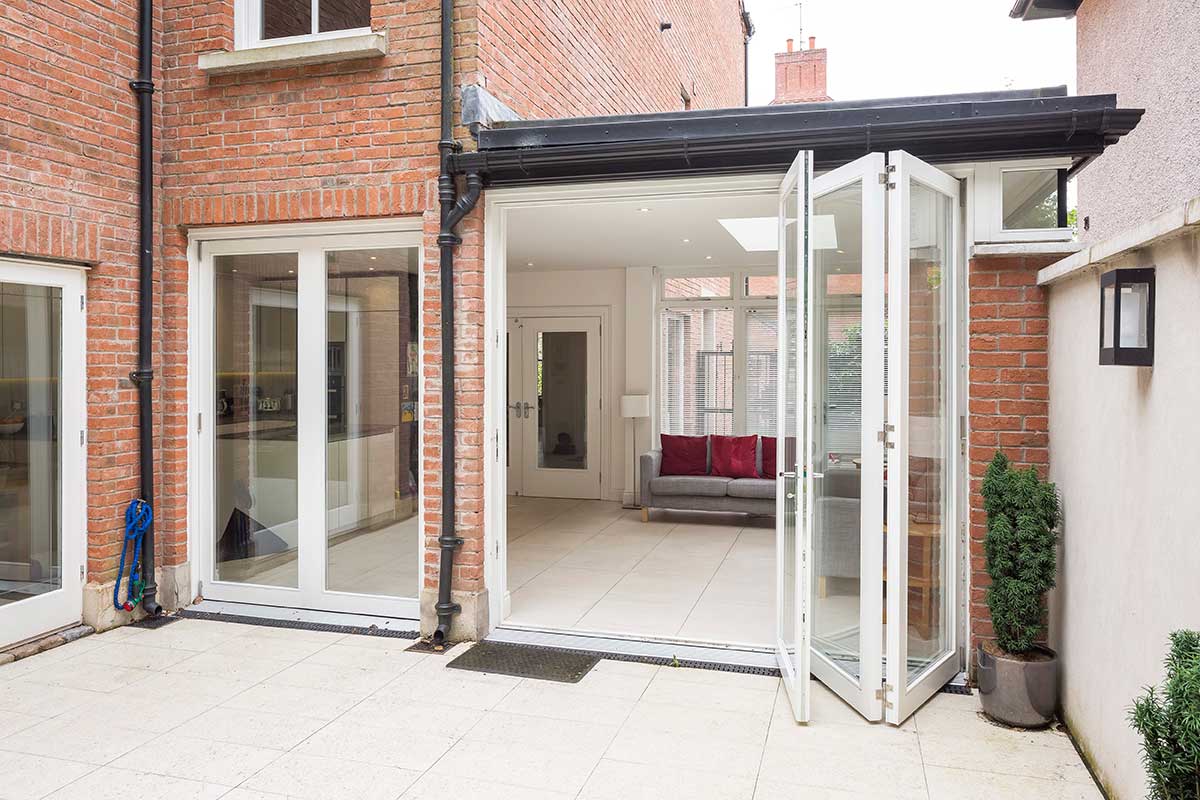
“The greatest transformation came from the rooflights, they make us feel the extension has always been a part of the house. That it belongs there,” adds Rhea. Trifold doors and the use of the same tiles inside and out make the 13sqm addition seem much larger than it is.
“The bifold doors at the front of the extension allow a different quality of light – we have sun streaming in from every direction which makes it feel very airy. The house in Australia was big and bright and we wanted to recreate some of the things that worked there.”
“Because of where we are, there’s also a management company we had to consult, we had to make sure they wouldn’t be adversely affected, and of course we also gave notice to our neighbours. Most of the work was done on our side so visually this wouldn’t impact on them but the construction does cause some disruption.”
“Thankfully the architect, who project managed the build, and the builders were considerate, very neat and clean,” adds Rhea. This process took a few months. “As we had everything ready to go – we’d appointed our contractor at this stage – the wait felt longer than it actually was. We’d also just had our fourth child so it was a bit of a chaotic time.”
Reconfiguration
“We wanted underfloor heating in the extension, as we find it very cosy, but to accommodate it we had to move things around,” explains Rhea. “Even though the main boiler stayed put we had to upgrade the electrics and run the pipes for the heating.”
The narrow hallway, toilet and cloakroom were reconfigured; the wc was moved to underneath the staircase which meant moving around plumbing, the electrical box also had to be relocated – to the floor above – as it used to be in the wc. The upstairs bathroom, which was spacious, was made smaller to create a boiler room/ utility. The existing immersion cupboard was incorporated into this new room and the washing machine/drier were moved there too, freeing up space in the kitchen.
Reducing the floor space in the main bathroom meant they had to get rid of their shower. “We put a handheld shower in the bath; as we have walk-in showers in our two ensuite bathrooms we didn’t really use the one in the main bathroom anyway,” says Rhea. The project went to site, and as Rhea was busy with the family, James was more involved.
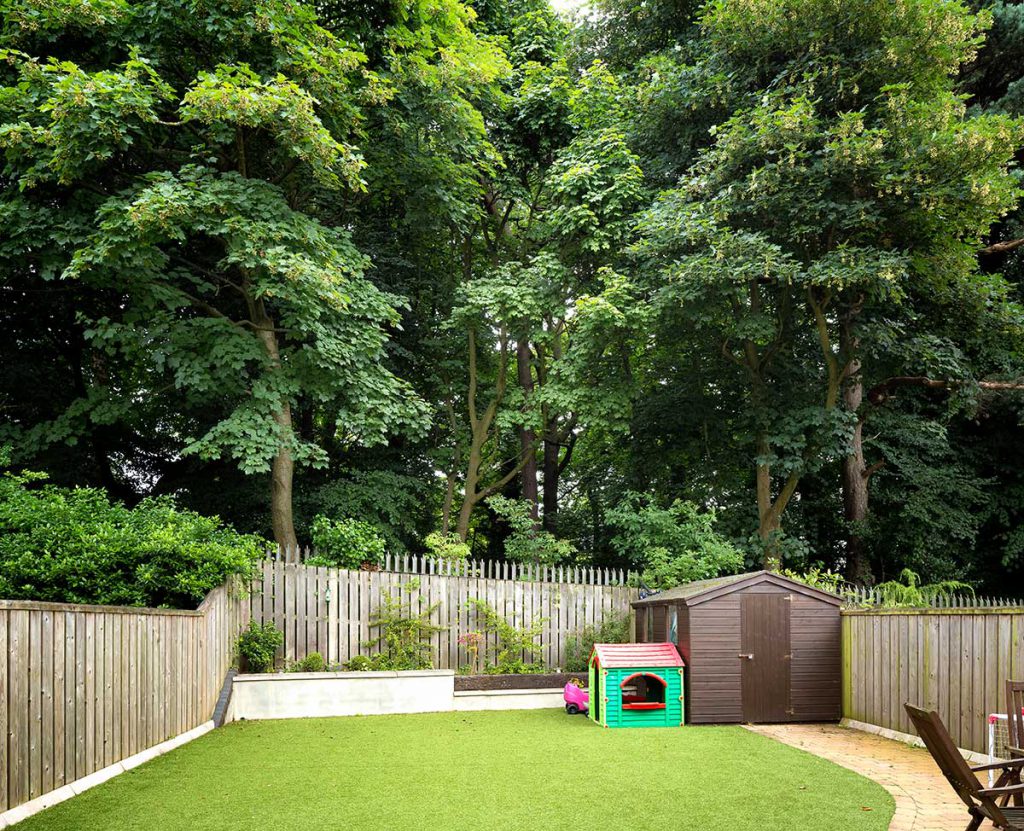
“He was working but also the one to call for any of the building issues; thankfully there were few.” They had to move out for four months while the work was taking place. One element that had to be added during the construction phase was the railing and walls outside, in keeping with the neighbourhood style. In fact the outdoor area was as important as building the extension and even though they encroached onto it to add the new living space, it feels bigger now.
“It’s a bit of a paradox but the fact that we no longer have a step down to get to the lawn – we’ve levelled it out during the works – makes it feel much more spacious,” says Rhea. “The garden looks so much better, being on level now is also great for the children.” The couple swears by the artificial grass they installed and are over the moon with the outdoor lighting scheme.
Not surprisingly, artificial lighting also took centre stage in the house. “We’re not really into showy or very ornate finishes but when the lighting supplier insisted we have a statement light in the hallway, we took his advice and we’re glad we did, the space did require some ornamentation.”
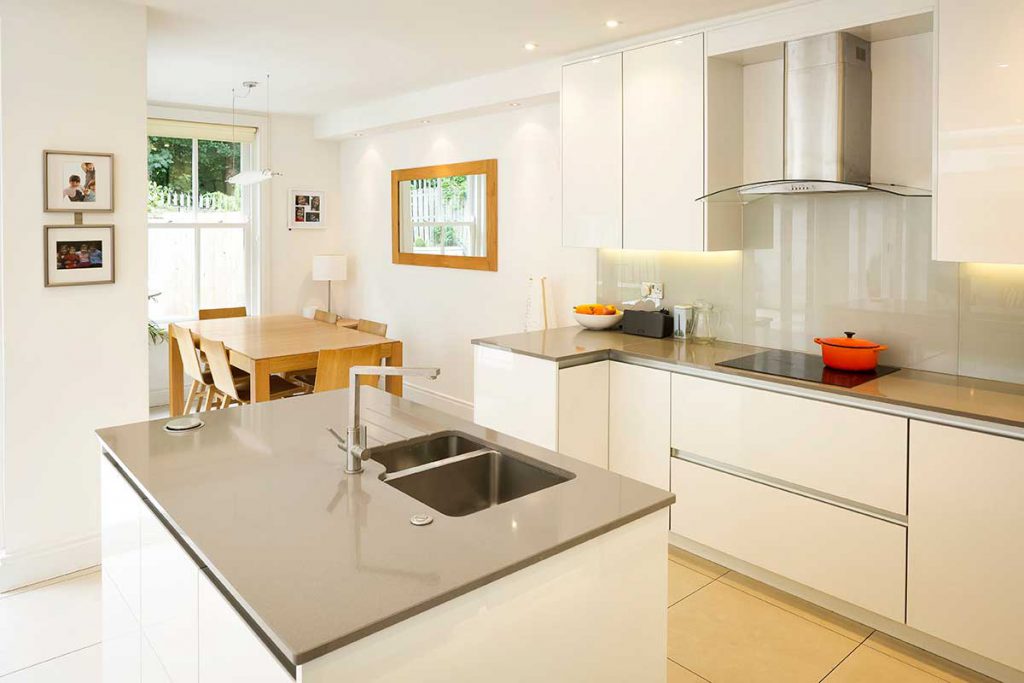
There are spots in the kitchen along the party wall, which work well to illuminate the worktops.
“The only issue we had was with the light above the kitchen table, it turned out to be too bright so we added a dimmer switch,” adds Rhea.
They took this opportunity to upgrade their kitchen to a more contemporary style; thankfully they were able to keep the carcasses which resulted in a saving. They simply changed the doors and added new taps and appliances. Having lived in the house through winters and summers, Rhea says that even though the high level of glazing can lead to some overheating in summer, they simply open the two sets of folding doors, which provides a pleasant breeze.
“It’s a bit of a paradox but the fact that we no longer have a step down to get to the lawn – we’ve levelled it out during the works – makes it feel much more spacious,”
“In winter the underfloor heating is great, we didn’t want radiators taking up space on the walls or be subject to draughts. It’s a cosy space all year round.” Reminiscent of Australia perhaps?
Light filled renovation: specification
Construction type (extension): blockwork cavity walls
Insulation: additional 200mm quilt insulation added to the existing attic ceiling. Extension cavity walls partially filled with 60mm PIR insulation to achieve U-value of 0.25 W/sqmK; floor screed with underfloor heating above 100mm PIR to achieve a U-value of 0.18 W/sqmK; flat roof 150mm PIR insulation to achieve a U-value of 0.16 W/sqmK
Windows: hardwood painted and double glazed, average U-value on units 1.2 W/sqmK
Suppliers
Architect: Dominic Morris MRIAI RIBA, Hillsborough, Co Down, tel. 9268 2316, www.mcnallymorris.com
Insulation: Kingspan Insulation, walls: Thermawall, floor: Thermafloor TF70, roof: Thermaroof TR26, www.kingspaninsulation.ie
Photographer: Paul Lindsay at Christopher Hill Photographic, Belfast, tel. 9024 5038, www.scenicireland.com